When friends and family come to me for advice on starting up an e-commerce website of their own, I typically refer them to Magento, which is to date the most polished and full featured e-commerce platform I’ve ever seen. Even better, Magento Community Edition is available to download for free, and professionally designed templates are widely available.
There is, however, one rather sizable snag. While the technical installation of Magento is both easy to follow and well-documented, the basic install then leaves you with a blank home page and no real instructions on where to go next.
That’s what this tutorial is here to help with. By the end of this guide, you’ll have logged in as the administrator of your new Magento website, you’ll have become familiar with Magento’s category system, you’ll have created your first product for display and sale on the site, and you’ll have created a simple product listing layout to allow your customers to peruse what you have for sale.
Ready? Let’s go!
Logging In As The Administrator
This one’s easy – just one step. We simply want to get access to the administrator interface of your new Magento installation.
1. If you installed Magento under the directory /magento/, navigate in your web browser to http://yourwebsite.com/magento/admin/ .
Setting Up A Product Category
Our first task is to get a product category displaying on the front page of your new Magento store.
1. Under the Catalog menu, select Manage Categories.
2. This page is split into two columns – the left column lists existing categories, and the right displays information upon them. A “Default Category” will already exist, so we’ll make use of that for now (creating a new category is pretty simple when you need to actually do that). Click the name of the category in the left-side column to load its information.
3. Under the General Information tab, set Is Active to “Yes”.
4. Our last step in setting up a product category is to make note of the category ID number. It’s displayed at the top of the page beside the name. Example: “Default Category (ID: 2)”, meaning a category ID of 2.
Display A Category On The Home Page
Incredibly, Magento’s default template is not configured to show anything on its home page. Yes, anything – the default page content is practically blank. Since we’ve now got a product category set up that we want to show to customers, we’ll update this page with a short piece of code that will do just that.
1. Under the CMS menu, select Pages.
2. Click the page with the URL Key of “home” to work on the CMS home page.
3. Under the Page Information tab, set the Page Title to whatever you wish the front page’s <title> tag to read. Ensure that Status is set to “Enabled”.
4. In the Content tab, erase what exists and paste the following:
{{block type="catalog/product_list" category="2" template="catalog/product/list.phtml"}}
Note in the above we’ve specified a category value of 2. This value corresponds to the category ID number we noted in the previous section.
5. Click the Save Page button. We’ve now got Magento set up to display the contents of a category on its home page.
Creating Your First Product
We’ve got the category – now we need products to display within them.
1. Under the Catalog menu, select Manage Products.
2. In the top-right corner, click the Add Product button.
3. Leave Attribute Set as “Default” and Product Type as “Simple Product”. Press Continue.
4. In the General tab, add a product Name, Description, SKU, and Weight. Set Status to “Enabled”. Click the Save and Continue Edit button.
5. You should next be taken to the Prices tab. Enter a value for Price and set a Tax Class. Click the Save and Continue Edit button.
6. Click the Inventory tab for the product. Set the Qty field to any number above zero. Set the Stock Availability option to “In Stock”. Click the Save and Continue Edit button.
7. Click the Images tab for the product. Click the Browse Files… button and select the image file (GIF, JPEG or PNG) you wish to use to represent the image. Now press the Upload Files button to upload the image file to the server.
You should now be presented with a page that lists, in rows, the image options for your new product – with the default selections all being set to “No image”. Change this by first mousing over the box that reads “Roll Over for preview”. Verify that the thumbnail of the image matches what you have just uploaded. To set this image as the one to represent the product, under the Base Image, Small Image and Thumbnail columns select the radio buttons in the row representing your uploaded image.
8. Finally, we want to add this product to the category that appears on your home page. Click the Categories tab and check the category you’ve set up earlier to display on the home page.
9. Done! Click the Save button to finish working on this product.
You’re Done!
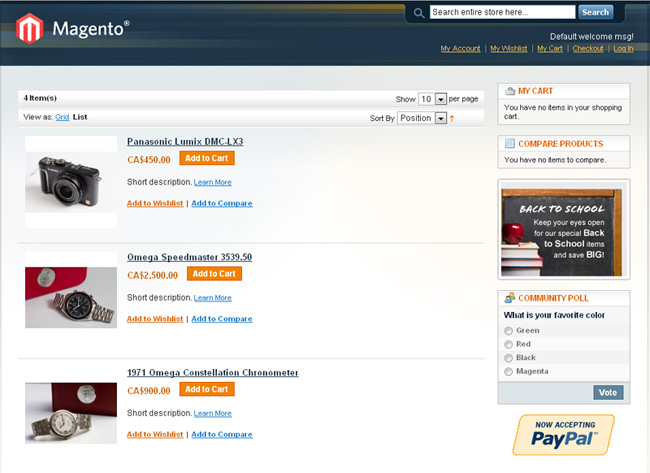
On the front page of new your Magento installation (following the example above, found at http://yourwebsite.com/magento/ ) you should now see a list of products in the category you created. Congratulations, and good luck with your new e-store!
this tutorial was very helpful, now i am able to display my product on the front page…but one step was forgotten you to specify on which websites your product should be displayed…thx once again
Such a brilliant tutorial as always!! :) You mentioned content is always inspirational and I have found the magento bit more then informative. By the way I like this content. Thanks! ;)